Monday, March 12, 2012

A Feature

Just wanted to say hello to everyone joining from Remodelaholic!! 
Welcome!!

My husband and I had a blast getting this room ready for our little guy and being able to accumulate pieces throughout my pregnancy.
Here is a link to the post on their site.
Several highlights.
*the whale over the crib was a DIY and freehand drawn then cut out with the jig saw. ($7.00)
*I made the bedding with some designer close out fabric I scored for 14.00 a yard!! The majority of the bumpers are made out of heavy duty white denim.(around $100.00 in fabric)
* The rug and the crib are both from Pottery Barn on sale. (from the PB outlet)
*the zig zag chair was my first ever upholstery project.
*the chest is from my husbands room growing up and the changing table was mine.

Feel free to email me @ jbrodden@gmail.com if you have any more questions!

Hop on over to Remodelaholic and see all the wonderfully inspiring projects they have!

Thanks again for the feature!!

Sunday, March 11, 2012

Nursery Diaries: The Nursery

This post is Long overdue.
Our sweet baby boy turned 8 weeks old today!!!

It is just crazy how quickly the weeks have passed.

This room posed quite a few challenges. 

First challenge the room only has two full walls.

It also has no natural light!

Here is what I came up with.
This is what you see at the top of the stairs. 

The print is compliments of Lay Baby Lay.
It's the quote made famous in the 50's "Babies don't keep"

Here is the first view of the room.
(from the top stair)


This bedding was truely a labor of love. 
I might be adding a monogram to the bumper, and in our next home I will add more pattern with drapes.


Here is the view of the wall the crib is on. 

We had a blast making the whale, mobile and adding our own upholstry touches.

I have a small sailboat print still needing to be framed and hung over the chair on the right. 
Will post a picture once that is hung soon.
Love his monogram!!
The prints were purchased on Etsy.
And the seahorse is from ZGallerie!!

Here are the diaper pins from AC's nursery, and this is the toy storage nook next to the closet.
This is the half wall leading up the stairs. 
This was my changing table and we were able to use it for baby girl and now for C.

And one last look.

Thanks for letting me share!

Here are the links to the rest of the Nursery Diary series:


Tuesday, March 6, 2012

Painting Progress

Remember this post on doing a DIY painting?

Well this is the base coat.. 

I think I have a long way to go.
Here is the view in the room.
so this houses den will make a nice playroom/movie room in the next house... 
Only took us being here three years to FINALLY get it the way we want it. 
(need to show y'all a pic with the area rug we jut got) 

Sunday, March 4, 2012

Master Bedroom Update #2

So remember that fabric swatch I have been hanging onto for close to 6 months??
I FINALLY broke down and made it!

IF you missed the post back in october about painting our bedroom  click here.
The original master bedroom reveal was here.
And here is the rooms inspiration.
Quite the metamorphasis!! 
Now to purchase the standard shams and my waterfall skirted comforter! 
One day we will finish this room. haha Two years in the making!

Stay tuned for a picture frame tutorial coming soon!

PS. I was terrified to sew the circular ends, ended up being easy peesy lemon squeezy!!

Saturday, March 3, 2012

My newest obsession!

Thanks to a dear friend for giving me the conversion software for my embroidery machine I can now do stuff like this!!!


Can't wait to show you more!!!

Wednesday, February 29, 2012

Guess What I am working on??

Yes it is true... we are FINALLY starting to finish up the backyard!!


Mine will probably not be this elaborate... but anything is better than weeds, grapevine, and kudzu.

Somedays I have dreamed I would die. Death by overgrown in kudzu!


Cant wait to get everything mulched and show off my massive clump of day lillies. 
finally after 3 years of living here I can share the yard behind the guesthouse.


our beds will more than likely look like this, sans the fancy fence. but nonetheless weed free beds sound amazing right about now.

Friday, February 24, 2012

Dining Room Progress

Our poor dining room. 
It has seen quite too many transformations in our lives in this house.
Most recently it looked like this.

What has changed??
1. my puppy has been hiding under the parsons chairs and chewing up anything she can get to.
like at least 100.00 worth of stuff a week. this has to stop!!
first thing first, put the chairs up!! and actually BUY some chairs for the room.
2. Clean and put away my beloved striped rug. (the puppies were tracking in mud on a white non-scotchgarded rug) and find a rug alternative.
3. Finish accessorizing this room!!

Here is where we are at right now.
{and yes that is frog tape at the back door waiting on proper weather to paint... hoping to complete that this weekend}
The Chairs:
you are probably now thinking why only buy two chairs?? well we are not planning on living in this house forever and in our next house the kitchen table will (fingers crossed, hopefully) have a built in banquet bench. So in that case we will only need two additional chairs. 
Here is an up close picture of the chairs.
yes complete with tags still. I have been dying for some oval cane back chairs but hubs and I both decided they will hold too much peanut butter residue. So these were our second choice.
What else?? Oh yeah...
For now, we have a basic area rug down to anchor the table. 
Accessories:
This room is so small it doesnt need much. 
One thing we will be needing is a highchair. Our old one didn't make the second child cut... Insert another great Essex find. This is what my dad called my highchair from the Jetson's. hahaha

AC can still fit in it and has actually preferred to be there as of late.

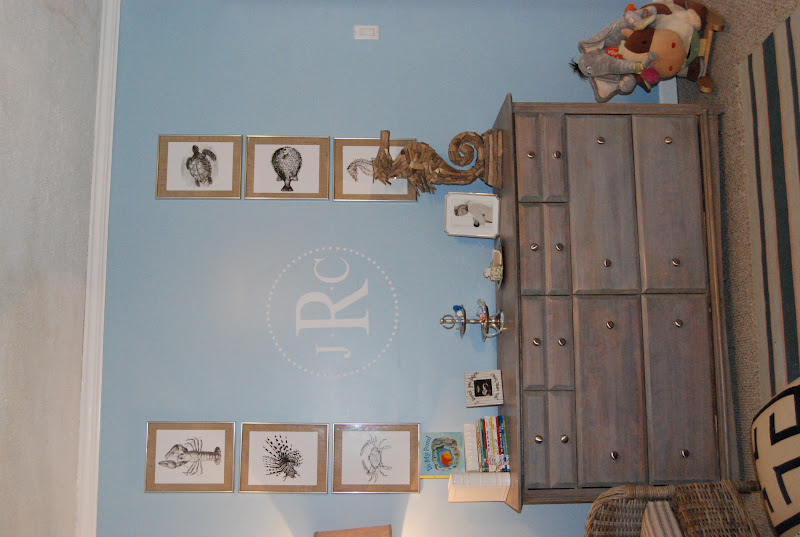
I have 3 more botanical prints to add to the collection but I am afraid basically hanging 3 more from the ceiling will only over power the small space. So they are being saved.
To add the lacking visual interest..
We moved my favorite print and ornate frame to the right of the mirrored piece. 

What is left??

Finish the window topper for this room!!!
Maybe make a cute table runner?? Or purchase some placemats? 
My mom actually gave us these.

Then I am planning on being done with this room... (in this house that is.)

Tuesday, February 21, 2012

The Pearl Girls

My friend Sibi is hosting the second annual Pearl Event "The Double Strand" in Nashville on March 10th. 
I cannot wait to spend the day hearing the testimony of these women and what the lord has laid on their hearts. 
Check out Sibi's blog at http://pearlsandgrace.blogspot.com
I am so excited about meeting several blogging friends in real life!!

If you want to join me send me an email. I believe there are around 20 seats remaining. 

Monday, February 20, 2012

1 month old

This past month has just flown by!!
I want to stop and freeze time. AC is saying the funniest stuff and C is changing a little more each day!
(I could not get him to look at me for all the tea in china, maybe next month)
one month stats.
(i know they are corny but I dont write anything down and this is going to serve as my "reference" for when I actually make time to filling in the baby book.)
head 50%
length 21 3/4= 25%
weight 8 pounds= 8%
needless to say we dropped down to 7 lb 6 oz at 2 weeks and have been trying to get back to birth weight (7/11) ever since. We are supplimenting 2 oz after every feeding to hopefully put some more meat on his bones.

Right after he was born we met with a local photographer to snap some newborn pics.
I am sooo pleased with how well they all turned out.
Here are just a few of the ones she captured.


This one melts my heart!

i think this is one of my favorite!


Sunday, February 19, 2012

DIY: Silk Flower Arrangement

Some say it is a blessed talent to be crafty, I call it a blessed curse. 
I just have a really hard time paying for something I know good and well I can either make on my own or easily recreate. 

Here I where I insert pictures of very expensive, unbelievably realistic looking silk floral arrangements
image courtesy of first fruit collection blog
This is an arrangement from the store I actually purchased the stems from.
Most of these arrangements run between 89.00-499.00 (depending on size)
 image courtesy of google
This is a live arrangement but could easily be recreated in high end silk pieces.

Step 1:
Fill vase of choice with floral foam. 
The foam comes in rectangular pieces, I just used a kitchen knife to trim the pieces down and fill the vase to the rim. (the stakes of the flowers will "adhere" the layers together)
(sorry the images have become distorted)
Step 2:
Fill the vase with the "innermost" pieces. For the wheat pieces it took way, way more than anticipated. I only planned on using one buschel of the wheat but ended up needing both.
Step 3:
Fill the vase with the lower "filling" element, this layer is not as thick as the middle. I cut the stems of the ferns down and manipulated the pieces so they alternated directions. 

Up close picture.


Step 4:
Cut the stalks of the color-pop accenting piece.
 And fill in around the vase every few inches.
Step 5:
Enjoy your beautiful centerpiece that cost you less than half the price.
When the arrangement isn't sitting on the table it is resting on our sideboard!! :)

Cost Breakdown:
vase $16
wheat buschels 2 at $8
red stalks 6 pack for $6
fern buschel $6

Total: $44 plus tax. not half bad.

Any questions feel free to email me at jbrodden@gmail.com