Showing posts with label home decor. Show all posts

Wednesday, August 15, 2012

An Annie Sloan love affair

Meet my vintage kitchen table I purchased from a local antiques store. 
She was only $100.00 but perfectly matched the Restoration Hardware table I had been dreaming of. 

When we purchased the table it was a muted sage green and I was wanting more of a distressed grey look. 

This table has been with us for about 3 years.  For far far too long it sat with a coat of white, and a very very grainy distressing of glaze that I applied with a dragging brush technique to "distress."

Seen on the left of the table in the pic below. It was ugly!

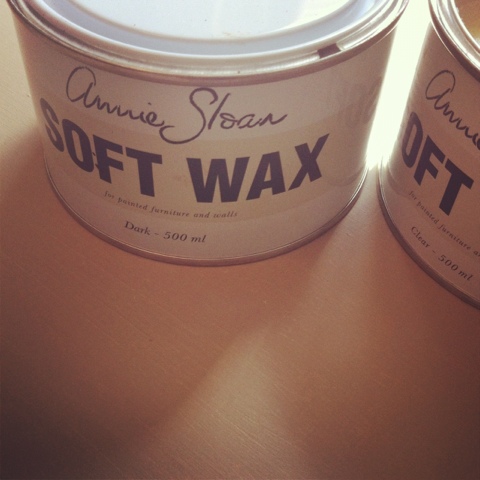
Didn't take me long to fall in love with Annie Sloan chalk paint. 

I also knew the paint would be an investment so I began to save and scheme what color I would use.
The 
Here is everything painted with the base color except the bottom of the legs.

We went to visit my husband's family in Mobile, Alabama and while there my mother-in-law and I 
discovered we both have been itching to buy AS paint. 


She looked up stores in the area and the sweetest lady at Heron House helped us determine what all we needed and even walked through the steps with us. She was amazing!
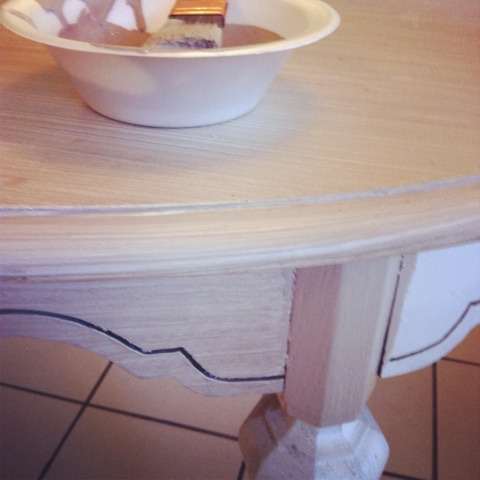
Here is the table with the basecoat and beginning to use the dark stain.

Added some more stain as I got more confident. 

In this picture you can see the dark stain on the left and not on the right. 

Had I thought this through more thoroughly I would have stained in the other direction so there are no lines meeting in the middle of the table. 

Oh well. Works for me, and I will know for my next project.

And the iphone pic of the finished result. 

We have been very very pleased with how beautifully it stained.

Tuesday, June 5, 2012

The Evolution of a Room

I had so much fun the other day putting together the living room over the past 3 years so I thought I would do the same with our master bedroom.
Remember this post on our bedroom completion??

Well here is an official recap of where we started and where we are now.
Here is our home in Fall 2009.
bad iphone pic.
First thing I did was remove the mirror attached to the dresser.
And attempt to gather plates/accessories above the piece.

Then I painted the back wall with an iridescent trellis pattern.
This was just NOT doing it for me so after lots of inspiration pictures I convinced my husband to help me in painting our master bedroom popcorn Kernel by BM.

Ahh much better. 
Then all we needed was some accessorizing. 
Here she sits today.
Ahh so much better.

I am sure in our next home I will need to do some tweaking per that room but I am happy to say this room is complete with spring/summer bedding. 
(For fall/ winter I hope to have my linen waterfall coverlet)


Thank yall so much for allowing me to "work my way" through this room and make it work best for me and my family!!

I will be sharing this before and after over at Thrifty Decor Chick. and KellysKorner.

We are showing our master bedrooms over at Kelly's!

Come see all the other fabulous before and afters!

Saturday, April 28, 2012

DIY Wooden Picture Frames

**update..... August 2014, its time to revise and revamp this tutorial. right?? working on doing that right now!! stay tuned for a reveal in September 2014

Are you a fan of rustic picture frames??

(via)
These frames are by 2 princesses and 2 frogs. They can be purchased at a local store.

Here is an enormous display of some similar frames.
(via)
I am going to attempt to recreate these with some scrap wood I have in my garage.
Have you seen these on pinterest??

Looks pretty easy.
And much more cost effective to make your own!!

Here is what I came up with.
My "hack" for a $60.00 frame. yes... 60 bucks for scrapwood!

My inspiration:
I purchased one of these frames then decided I could make my own to create a "collection" of this type of frame.

Supply List:
*gorilla glue
*assortment of acrylic paint
*scrap wood
*small mounting  board from hobby lobby or local craft store.
*small clip frame from hobby lobby or local craft store
*paint brushes

btw: Found the mounting board on the unfinished wood aisle in hob lob.

Step1:
Gather some scrap wood and decide which direction you want the wood to go in. These pieces were actually one long 1x2 I had my husband cut down.

Step2:
Have the pieces of wood cut the same length and use your gorilla glue to make a small bead of glue between the wood. 
Sit and let "set" for a little over an hour.

Step 3:
Paint the scrap wood layer with a coat of paint and let dry
Paint the mounting board layer and let dry.
Step 4:
Use your gorilla glue to do small dots or a bead of the glue, don't forget to lay something heavy on top for the glue to disperse evenly.

Step 5:
Nail a small nail into the mounting board to attach the clip frame from,
also sand the edges of the mounting board and the edges of the wood.

Step 6: 
Decide where to hang, what picture to use, then step back and enjoy!
I think a new school picture will do nicely!
(sorry this one is crooked)

For comparison:
mine $3.00
theirs $60 + tax


LOVIN' $3.00 ALL day Long!! 


Tuesday, April 3, 2012

Spring and Easter Decor

Hello there!! 
Just wanted to stop in and share some pics of our easter decor around the house.

It was raining today so some of the pictures are a little dark.
Entry area with the Pottery Barn inspired arrangement.
On the ledge is just the cutest baby chick with a vase filled of pastel easter eggs.
The bird candle made his way to my favorite side table!
AND.....
I finally got the chance to try out some accessories on the ottoman in the den!

**sidenote: I have been iphone app-less for the past 2.5 weeks. long story short i dropped the phone, screen cracked, got new phone, and all of my apple id/email went wonky and not until tonight was I able to go to the genius bar and get everything ironed out.

Say a prayer the restore from the backup gets everything back in order. I forgot what life before iphones was like... wahhh wahhh  BORING. #firstworldproblems

Be back later to showcase the rest of our spring decor.


Tuesday, March 6, 2012

Painting Progress

Remember this post on doing a DIY painting?

Well this is the base coat.. 

I think I have a long way to go.
Here is the view in the room.
so this houses den will make a nice playroom/movie room in the next house... 
Only took us being here three years to FINALLY get it the way we want it. 
(need to show y'all a pic with the area rug we jut got) 

Saturday, March 3, 2012

My newest obsession!

Thanks to a dear friend for giving me the conversion software for my embroidery machine I can now do stuff like this!!!


Can't wait to show you more!!!

Friday, February 24, 2012

Dining Room Progress

Our poor dining room. 
It has seen quite too many transformations in our lives in this house.
Most recently it looked like this.

What has changed??
1. my puppy has been hiding under the parsons chairs and chewing up anything she can get to.
like at least 100.00 worth of stuff a week. this has to stop!!
first thing first, put the chairs up!! and actually BUY some chairs for the room.
2. Clean and put away my beloved striped rug. (the puppies were tracking in mud on a white non-scotchgarded rug) and find a rug alternative.
3. Finish accessorizing this room!!

Here is where we are at right now.
{and yes that is frog tape at the back door waiting on proper weather to paint... hoping to complete that this weekend}
The Chairs:
you are probably now thinking why only buy two chairs?? well we are not planning on living in this house forever and in our next house the kitchen table will (fingers crossed, hopefully) have a built in banquet bench. So in that case we will only need two additional chairs. 
Here is an up close picture of the chairs.
yes complete with tags still. I have been dying for some oval cane back chairs but hubs and I both decided they will hold too much peanut butter residue. So these were our second choice.
What else?? Oh yeah...
For now, we have a basic area rug down to anchor the table. 
Accessories:
This room is so small it doesnt need much. 
One thing we will be needing is a highchair. Our old one didn't make the second child cut... Insert another great Essex find. This is what my dad called my highchair from the Jetson's. hahaha

AC can still fit in it and has actually preferred to be there as of late.

I have 3 more botanical prints to add to the collection but I am afraid basically hanging 3 more from the ceiling will only over power the small space. So they are being saved.
To add the lacking visual interest..
We moved my favorite print and ornate frame to the right of the mirrored piece. 

What is left??

Finish the window topper for this room!!!
Maybe make a cute table runner?? Or purchase some placemats? 
My mom actually gave us these.

Then I am planning on being done with this room... (in this house that is.)

Sunday, February 19, 2012

DIY: Silk Flower Arrangement

Some say it is a blessed talent to be crafty, I call it a blessed curse. 
I just have a really hard time paying for something I know good and well I can either make on my own or easily recreate. 

Here I where I insert pictures of very expensive, unbelievably realistic looking silk floral arrangements
image courtesy of first fruit collection blog
This is an arrangement from the store I actually purchased the stems from.
Most of these arrangements run between 89.00-499.00 (depending on size)
 image courtesy of google
This is a live arrangement but could easily be recreated in high end silk pieces.

Step 1:
Fill vase of choice with floral foam. 
The foam comes in rectangular pieces, I just used a kitchen knife to trim the pieces down and fill the vase to the rim. (the stakes of the flowers will "adhere" the layers together)
(sorry the images have become distorted)
Step 2:
Fill the vase with the "innermost" pieces. For the wheat pieces it took way, way more than anticipated. I only planned on using one buschel of the wheat but ended up needing both.
Step 3:
Fill the vase with the lower "filling" element, this layer is not as thick as the middle. I cut the stems of the ferns down and manipulated the pieces so they alternated directions. 

Up close picture.


Step 4:
Cut the stalks of the color-pop accenting piece.
 And fill in around the vase every few inches.
Step 5:
Enjoy your beautiful centerpiece that cost you less than half the price.
When the arrangement isn't sitting on the table it is resting on our sideboard!! :)

Cost Breakdown:
vase $16
wheat buschels 2 at $8
red stalks 6 pack for $6
fern buschel $6

Total: $44 plus tax. not half bad.

Any questions feel free to email me at jbrodden@gmail.com