
**update..... August 2014, its time to revise and revamp this tutorial. right?? working on doing that right now!! stay tuned for a reveal in September 2014
Are you a fan of rustic picture frames??

(via)
These frames are by 2 princesses and 2 frogs. They can be purchased at a local store.
Here is an enormous display of some similar frames.

(via)
I am going to attempt to recreate these with some scrap wood I have in my garage.


Have you seen these on pinterest??
Looks pretty easy.
And much more cost effective to make your own!!
Here is what I came up with.
My "hack" for a $60.00 frame. yes... 60 bucks for scrapwood!
My inspiration:
 I purchased one of these frames then decided I could make my own to create a "collection" of this type of frame.
Supply List:
*gorilla glue
*assortment of acrylic paint
*scrap wood
*small mounting board from hobby lobby or local craft store.
*small clip frame from hobby lobby or local craft store
*paint brushes

btw: Found the mounting board on the unfinished wood aisle in hob lob.
Step1:


Step 3:
Paint the scrap wood layer with a coat of paint and let dry
Paint the mounting board layer and let dry.


Step 5:
Nail a small nail into the mounting board to attach the clip frame from,
also sand the edges of the mounting board and the edges of the wood.

Step 6:
Decide where to hang, what picture to use, then step back and enjoy!


Looks pretty easy.
And much more cost effective to make your own!!
Here is what I came up with.
My "hack" for a $60.00 frame. yes... 60 bucks for scrapwood!
My inspiration:

Supply List:
*gorilla glue
*assortment of acrylic paint
*scrap wood
*small mounting board from hobby lobby or local craft store.
*small clip frame from hobby lobby or local craft store
*paint brushes

btw: Found the mounting board on the unfinished wood aisle in hob lob.
Step1:

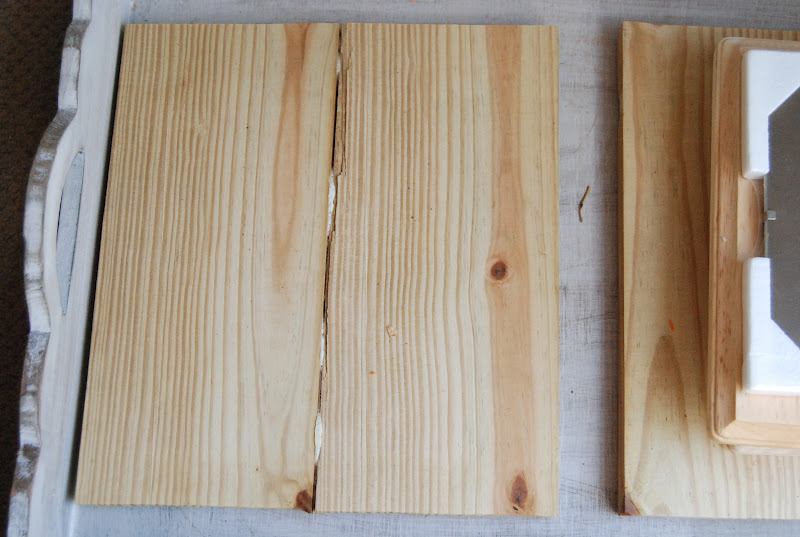
Gather some scrap wood and decide which direction you want the wood to go in. These pieces were actually one long 1x2 I had my husband cut down.
Step2:
Have the pieces of wood cut the same length and use your gorilla glue to make a small bead of glue between the wood.
Sit and let "set" for a little over an hour.
Paint the scrap wood layer with a coat of paint and let dry
Paint the mounting board layer and let dry.

Step 4:
Use your gorilla glue to do small dots or a bead of the glue, don't forget to lay something heavy on top for the glue to disperse evenly.

Nail a small nail into the mounting board to attach the clip frame from,
also sand the edges of the mounting board and the edges of the wood.

Decide where to hang, what picture to use, then step back and enjoy!

I think a new school picture will do nicely!
(sorry this one is crooked)
For comparison:
mine $3.00

theirs $60 + tax

LOVIN' $3.00 ALL day Long!!


9 comments:
Those are so great! I have got to do this!
Hey, great job! These have been on my list to re-create for a long time! You nailed it (forgive the pun)!
Wow, that looks incredible! I was searching for a diy frame and I think I'll be trying this asap! Thanks :)!
Wow, those look incredible! I've been searching for diy frame ideas and I'm going to try this out asap! Thanks :)!
These are awesome homemade frames! In Edmonton, my wife has been redecorating our home. She would love this!
Look incredible and so lovely too. I'm gonna try it too. Thanks for sharing.
I have been looking all morning on how to make these! Thank you so much for putting it out there! I do sand notes and wanted something beach like! Thank you again!
Thank you so much, I have been looking for this type of frame all morning! Finally found yours! I do Sand Notes and wanted to make my own frames that are more beach style! Thank you again! You are amazing!!!
Question for you: how did you mount the clip frame to the board? Is it removable? My clip frame opens from the back so other than making it removable I can't figure out how to attach it. Thanks!!! Love your frame!
Post a Comment