Showing posts with label rustic. Show all posts

Thursday, October 2, 2014

One Room Challenge: The Kitchen

So excited to be back this fall and to participate in the wonderful ORC!!!

For those of you that do not know what that is, Linda from the blog Calling it home is hosts this event in April and October and has 20 design bloggers join her in revamping or renovating a space. 

It give people like me a good opportunity to whip a room into shape!

As you all know I will be transforming our outdated 1979 kitchen and bringing it back to life. 

A few quick things.

1. countertops stay. 
we just replaced BOTH our HVAC so ughh my 12,000 countertops are keeping me cool in the summer and toasty in the winter. 

2.this house is the money pit, 
so it is HIGHLY possible something crazy will pop up. 

this could get way fun!!!

3. I have been dying to do this since we moved in 14 months ago!!!!

Now... lets get started!!

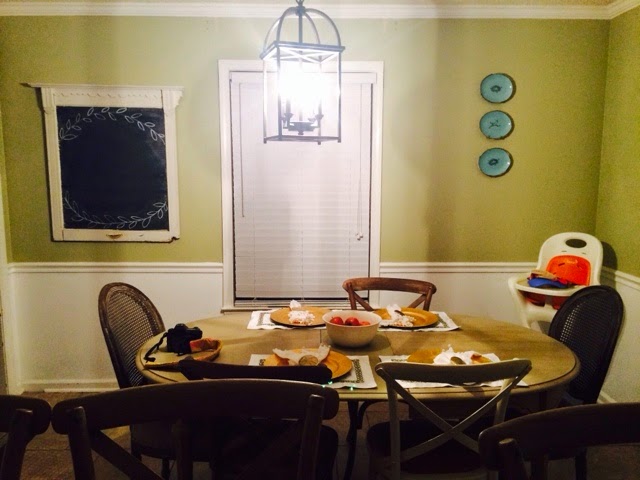
The layout of the space is remaining so here we are.

how hilarious is it that my child is shaking her groove thing while I took this picture. HA

This is the view from the front door entering the house.

I know you are sad this is going!

(cabinets are not in the best of shape so I will begin now filling in the holes and chunking this hardware)

reminding myself of the end......

In late April I had enough of budge matte walls so we went ahead and selected our wall color. We used Farrell Calhoun paint and the color is Bayou Shade by valspar.
(this is probably the truest depiction of the color)
So here we sit! 

Over the next 5 weeks we will conquer:
backsplash
paint all cabinets
add molding throughout the space
refinish the table
make cushions and drapery for the space
build a kitchen island
Create a custom vent hood

Here are a few inspiration pics I keep going back to.

When we DO get around to countertops this is the family we are looking in.

base cabinet inspiration

ventahood inspiration

base cabinets again

and backsplash inspiration

Stay tuned, its going to be fast and furious!

Friday, April 12, 2013

From Wash to Stain

Remember my post from a few weeks back about my wooden spool for our patio???
Out with the old in with the old??

Well I attempted to gray wash it and the wood just Soaked it up...

Second attempt I went out to the garage to discover I had a decent amount of stain left from working on our front door ;)

After a quick hour in amazing spring weather and Tada!!

Very excited to start dining around this table this spring!

Thank you Restoring Piece of Tuscaloosa, Alabama for such a unique piece!

Now time to style the table and enjoy a nice grilled dinner on the porch!


Saturday, April 28, 2012

DIY Wooden Picture Frames

**update..... August 2014, its time to revise and revamp this tutorial. right?? working on doing that right now!! stay tuned for a reveal in September 2014

Are you a fan of rustic picture frames??

(via)
These frames are by 2 princesses and 2 frogs. They can be purchased at a local store.

Here is an enormous display of some similar frames.
(via)
I am going to attempt to recreate these with some scrap wood I have in my garage.
Have you seen these on pinterest??

Looks pretty easy.
And much more cost effective to make your own!!

Here is what I came up with.
My "hack" for a $60.00 frame. yes... 60 bucks for scrapwood!

My inspiration:
I purchased one of these frames then decided I could make my own to create a "collection" of this type of frame.

Supply List:
*gorilla glue
*assortment of acrylic paint
*scrap wood
*small mounting  board from hobby lobby or local craft store.
*small clip frame from hobby lobby or local craft store
*paint brushes

btw: Found the mounting board on the unfinished wood aisle in hob lob.

Step1:
Gather some scrap wood and decide which direction you want the wood to go in. These pieces were actually one long 1x2 I had my husband cut down.

Step2:
Have the pieces of wood cut the same length and use your gorilla glue to make a small bead of glue between the wood. 
Sit and let "set" for a little over an hour.

Step 3:
Paint the scrap wood layer with a coat of paint and let dry
Paint the mounting board layer and let dry.
Step 4:
Use your gorilla glue to do small dots or a bead of the glue, don't forget to lay something heavy on top for the glue to disperse evenly.

Step 5:
Nail a small nail into the mounting board to attach the clip frame from,
also sand the edges of the mounting board and the edges of the wood.

Step 6: 
Decide where to hang, what picture to use, then step back and enjoy!
I think a new school picture will do nicely!
(sorry this one is crooked)

For comparison:
mine $3.00
theirs $60 + tax


LOVIN' $3.00 ALL day Long!! 


Friday, September 30, 2011

Den Design Board-client

Do you remember the post on the completely bare den?

Well here is one of the sample boards I shared with the couple.

It is crazy how you think you are going one direction and you end up going the complete opposite!

I go this weekend to do the final install of all the accessories.

Can NO WAIT to share with you guys!