Hello lovely readers.
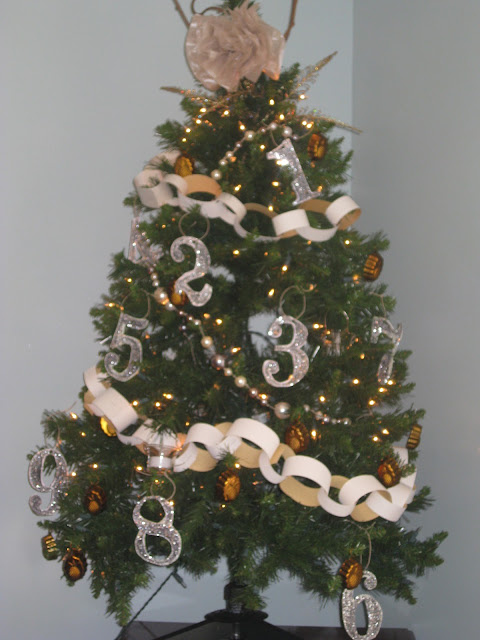
Today I am sharing my homemade tree.
(no the tree is not homemade, just all the decor)
There are several steps to each "ornament" grouping so I may be breaking this up into two posts.
We shall see.
A couple of years ago I found this AHmazing inspiration photo in Southern Living magazine.
To much avail I have been completely unsuccessful in finding the original photo.
I really wish i had it to share with yall.
First thing is first.
I knew I wanted art deco style numbers completely covered in glitter.
Luckily I found a great font and just printed the numbers in size 300 font out of Word.
I wanted to make sure my numbers were nice and sturdy so i glued the print off numbers
(already on medium weight cardstock)
To another layer of the cardstock.
Then I gather my glitter, brush and trusty ole elmer's and got to work.
Apply glue to numbers and brush the glue on for even glitter application.
Apply glitter before glue dries.
Ps. it will dry a little faster due to spreading the glue out with the brush. DUH i know
Basically rinse, lather, repeat until your page is done.
Sidenote: I did this work in an old cookie sheet to contain the glitterness going on.
Trust me there was LOTS.
After cutting out and drying i used my single hole punch and tied a circle of twine on to hang on the tree.
Okay ornament grouping # 1 donezo...
Enter elegance from pearescence.
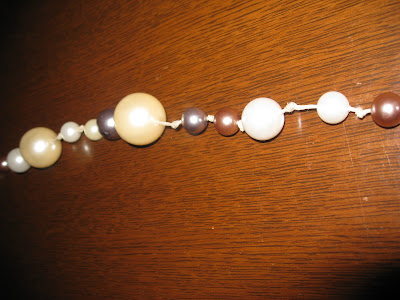
I went plundering through my "stash" of things mom was getting rid of in her garage sale and Voila.
PBOutlet sale Beads.
I checked the sizing with my already on hand twine and... SCORE, the twine slipped onto the beads.
Pretty straight forward on this, just either establish a pattern{my pattern was at random}
Rinse,
Lather,
Repeat again...
Tie knots between beads so they don't slip around.
Because i did not have a super full box i made a tiny strand for the top and a larger/longer strand for the largest portion of the tree.
{As seen below}
Now... do you notice the little copper dittys scattered about??
Can you guess what they are?
Think gifts....
Well, they are the miniature molds attached to every William Sonoma Wedding Registry Gift.
When we got married i had NO clue what i would do with them.
Mom suggested I save them and do a fun tree with them.
This seemed like the perfect year.
And it is so special to have these little items as reminders of all our wonderful family and friends who so graciously blessed us before we were married!
I LOVE looking at them.
And did you know the PINEAPPLE is the symbol of hospitality??
Well we are in the south and being hospitable is just a way of life around here.
Here is an upclose of one so you can see what they really look like.
For the tree topper I used several items.
Glitter feathers and twigs are from Hobby Lobby last christmas.
And the pouf was super easy. I found some wedding iridescent tissue paper at Hallmark and cut an 8x8 square.
Accordianed the tissue,
Tied a pipe cleaner in the middle,
And gently spread the layers to the front.
Super Easy.
Now what is a homemade tree without chain??
I found a TON of scrap cardstock laying around from various projects so i just cut some in 1/2inch widths and other as wide as 2 inches and attached with the stapler.
Again rinse, lather, repeat here....
Now as you can see things are slowly but surely coming together here.
And best of all....
Its adoreable, FREE decor!!!
I have been debating over gathering some burlap as a tree skirt or actually spending the time and making one.
I saw my sweet friend kellie's wreath in her babies' room and kinda had an idea....
What if i make a poinsetta cluster tree skirt?
Then i found this in Garnet Hill's catalog...
It's felt.
And it costs $198.00
I think i will attempt to make it.
If i do tackle this would yall like a tutorial on how to complete?
I will be back in another post to finish up the tree and share lots more.
Stay tuned.


