Saturday, April 7, 2012

Egg Hunt 2 and Easter Snapshots

Here are a few pictures from the hunt we had last Sunday.

We had a blast getting to hangout with some current neighborhood friends, and meet a few new ones.
A sea of eggs for roughly 12 kiddos between 2-3 yrs old.
Mommies made treats
I made the strawberries dipped in orange colored white chocolate. 
They are supposed to be carrots!

Table of goodies.
Miss priss
Time for the hunt!


some of the kiddos enjoying their treats.
I told Casey, "Quick, grab the camera! I have both babies and neither are crying!!" haha

We also met with our favorite photog and had her snap a few shots of the babes.

We originally planned this session so AC could have her picture made with baby chicks. Turns out she is deathly afraid of small animals, chickens, goats, baby bunnies, even freaked over a frog recently. Who knows with her. haha.
C could have cared less. 


Be back later with basket ideas and an easter tablescape.

Friday, April 6, 2012

Egg Hunt 1

This being our third year doing easter egg hunts we decided to only do 2. 

One hunt is hosted by the city of the suburb my parents live in and the other a friend from school orchestrated in our neighborhood. 

Here are a few pics we took to document the events.
about to leave the house

After arriving the anxiety really set in. I think we have determined my child does not have a competitive bone in her body. The rush of people headed to the eggs drove my sweet 3 yr old to tears. Poor thing :(
I finally convinced her to grab a few and see what was inside


She was way way more excitd about a dandellion than the eggs!


Tuesday, April 3, 2012

Spring and Easter Decor

Hello there!! 
Just wanted to stop in and share some pics of our easter decor around the house.

It was raining today so some of the pictures are a little dark.
Entry area with the Pottery Barn inspired arrangement.
On the ledge is just the cutest baby chick with a vase filled of pastel easter eggs.
The bird candle made his way to my favorite side table!
AND.....
I finally got the chance to try out some accessories on the ottoman in the den!

**sidenote: I have been iphone app-less for the past 2.5 weeks. long story short i dropped the phone, screen cracked, got new phone, and all of my apple id/email went wonky and not until tonight was I able to go to the genius bar and get everything ironed out.

Say a prayer the restore from the backup gets everything back in order. I forgot what life before iphones was like... wahhh wahhh  BORING. #firstworldproblems

Be back later to showcase the rest of our spring decor.


Traditional Meets Modern-client

We have made quite a few strides in a clients dining room.

She already owned the furniture and had already decided on a high gloss navy wall color. 
The color was an Awesome launching point!!

Here is where we are so far.
1. New lighting was key to update the look of this room
2. We "wallpapered" the back of the china cabinet to make the traditional china pop!
3.A modern interpretation of a plate gallery wall. When paired with a traditional gold mirror its a striking contrast
4. A mod cut velvet fabric was used on the seat cushion to incorporate the turqouise color
5. And most importantly a modern print drape.

Here is a look at the other side of the room

What's left?
1. accessorizing above the china cabinet
2. Styling the table and sideboard
3. a rug

And we can call this room done.

Monday, April 2, 2012

2 months old

This baby is growing quicker than I EVER imagined!!!

Since we will be 3 months old next week I figured it was high time to show some 2 month pics.
Sweet boy FINALLY started putting on some weight!
He was born at 7 lb. 11oz, dropped to 7 lb 3oz when we left the hospital and stayed at 8 pounds until close to 6 weeks.
At this six week growth spurt he got up to 10 lb. 3 oz.

Alot of this was due to sleeping for too long at a time and needing more to eat. 
Around a month we started to suppliment with some formula. He got used to eating a good six ounces total, 3 or so nursing and 3 from a bottle. 

The whole supplimenting thing super stressed me out with AC but I was VERY happy to not have put that pressure on myself this time. I am just glad to be offering the majority of my child's nourishment at this time!
(as it warms up I may no longer nurse, we were both sweating profusely at the egg hunt saturday, no fun) TMI?
C was going to sleep around 11 and waking up about 4:45-5:30.

Not happy about his shots :( he only cried for a quick minute which made mommy feel better.
Getting ready to bathe brother in his bathroom!
At 6 weeks on the nose he started smiling (at Mrs. Lisa Danielson while at dinner) He hasn't stopped since and we love hearing his sweet baby cooes.
8 weeks in this picture
already not wanting to take pictures with sister.. oh lordy!


Big Girl Haircut

I cant believe I actually let everyone talk me into this... but.... 
We cut ALOT of baby girl's hair!!
5.5" to be exact!
Here is angel pie first thing that morning.
goober
Poppy (my dad) hard at work!
eek

adding in some final layers
now, ever since we have cut her hair her sweet cheeks look chubbier and those BIG blue eyes!!! she is a complete mess!!!


Friday, March 30, 2012

Sunday School Sip n See

Sooo not quite sure how this slipped my mind but somehow I have never blogged the sip n see our sunday school class threw for C.

We met at one of my favorite Italian Restaurants and enjoyed dinner and cupcakes and opened sweet happies for our baby boy!


Mrs. Kim Loving on our sweet boy


We have thoroughly enjoyed the clothes. 
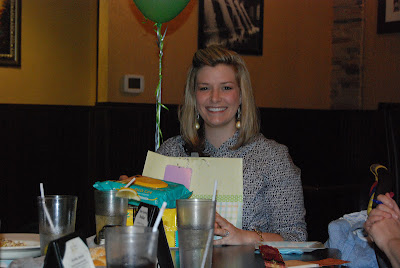
I am so thankful all these sweet ladies took time out of their busy schedules to hang out and get to know each other better. 

Thanks again ladies!

Tuesday, March 27, 2012

Burlap Carrots Tutorial

Recently a friend of mine found these adoreable carrots on pinterest.

I went to pinterest and I thought I would type up my version of how to put them together. 

Cost me around $4.50 and is super cute to boot!!
isnt she just the cutest thing ever??

Step 1: 
purchase 1 yard of orange burlap for about 3 large carrots
 (I found mine at Hobby Lobby)

Find some fun spriggy fillers in the floral department
(Mine was left over from christmas decor)

purchase one roll of ribbon

If you don't already have any poly fil get some of that, or I have seen people use plastic grocery store bags as filler!

Supplies:
scissors, glue gun, pony tail holder

Step 2:

Cut the burlap into a triangle shape.
Then use the hot glue gun and glue the two angled sides and the bottom together.

Step 3:
Fill the carrots with poly fil
Step 4:
Gather the carrot at the top and attach an elastic ponytail holder.

Step 5:
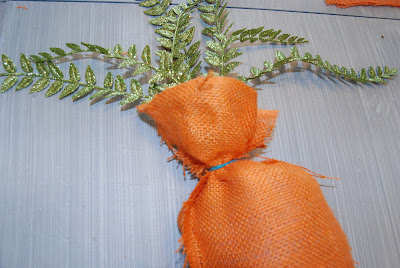
Stuff the green "spriggy" filler in the top of the carrot and tie a cute knot of ribbon around the carrot.


Step 6: 
Attach a small piece of ribbon or twine to the backside of the carrot to have something to hang the carrot from.

Hang and enjoy!!
(somehow through an update the images have rotated and become distorted, locating the original image to repost for y'all!)
The other two are hanging on my gate!!
(and they need some filler!)
Love having something bright and cheery to drive up to!