Showing posts with label Tutorials. Show all posts

Thursday, June 16, 2011

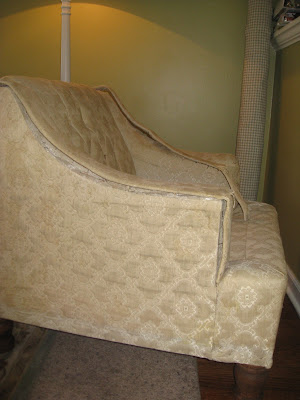
Upholstry, the story of a club chair.

I have been quite spacey this week and TOTALLY forgot to tell you all I shared my chair upholstry over at Cheap Chic Home on Tuesday, oops!!

Well this post will be the first in my actual "Tutorials" tab. 

Enjoy and if you have any questions at all feel free to email me.
Jenn32404@aol.com

 "what I wanted to learn  teach myself in 2011." 

It's Upholstry!!!

You see my neighbor placed this lovely club chair by the curb last spring and I just couldn't let it remain sitting there.

As you can see, I was very eager about starting this project, so a piece here and there was taken off pre-photo.

These pieces on the arms were removed first. 
Then I started a corner in the back and kept on going. 

At some point I had to cut the fabric because it was in such poor condition all it would do was start crumbling.
The only tools I used at this point were a pair of needle nose pliers...
 And a pair of wire cutters, they were great for really deep staples as the point could begin working the staple out.

once the top arm piece was removed I worked the outer sides off.
Until everything was gone

So order of removal was back, outer sides, insides, then front and back.
Notice the orange foam?? It was dry rotted, so I grabbed a bag of rolled batting to fill in over the springs.
removed the dry rotted orange foam.

Then I laid out all my saved pieces and used them as my pattern to cut the new pieces.
Laid out the new batting
I knew the arms would be fairly difficult so after cutting the front and tucking it in I began with the inner arms. 
**note to get the fabric to tuck into the bottom cushion and on the sides sometimes you will need to sit on the chair with your knee's to depress the springs and work the fabric to the back of the chair.

Then Grab your stapler, (I don't think an electric is a must but it surely helped!!) and don't forget to notch your curves so the fabric will lay flat.
This is notching.
 On the outside pieces I flipped the fabric right sides together and began stapling from the underneath side, from time to time I used the hammer to work some of the more stubborn staples in.
Then I pulled a staple or two out and began on the arm.
.
Lesson 1. this is TRULY a trial and error process!!

On the front seat I laid the fabric out and placed pins along the front corners of the chair to sew a very simple 6 " dart for better fitting.
Don't forget to cut excess fabric out before you attach to chair. 
Then you simply attach in the back of the chair 

Work your back piece on.

**note:When taking the chair apart I kept all the card board sheets and metal sheets I found inside the chair.

Here is where you will need to use some of the interior metal stripping, if any.

The big long pieces I used along the sides in the back of the chair; this added the nice straight line to make the fabric pull taught!!

Then sit back and admire your creation!!

Upholstry took patience and being able to walk away from the project for a while.

I came by the next day with a fresh mind and ready to work. 

Took me 4 days in all working about 2-3 hrs a day. 

And... saving me the $375.00 someone quoted me to upholster it!!!

Deal!!

Tuesday, March 1, 2011

Monogrammed pillows.Tutorial

I found some inspiration in an unexpected place a couple months back...
.
I saw these amazing monogrammed pillow sitting on a gorg couch in Guilana and Bill Rancic's Chicago apartment.
.
After researching for pictures for far too long I googled her name + monogram pillow and lo and behold a tweet popped up!! Yes, twitter is now an amazing resource!!
.
Come to find out these pillows are Jonathan Adler.
.

I love these pillows but I have an affinity to have something noone else will have, 
therefore I made my own!!
*here is another woman's interpretation of Giuliana's pillows
{via..google images}

To make your own:

Open Microsoft Word on your computer, 
.
and begin looking through the fonts
.
I used a similar sans serif font {to the Jonathan Adler pillows}
.
{this font is Bakersville and I modified the curl of the "r" to something more squared.}

I mixed it up by using lower case.
.
Did a few trial runs printing the one letter in a really large size;
 I believe 300, 400 something of this size.
{maybe even 600 for a lower case letter}
.
Cut the letter out and use it as your pattern to cut out your fabric 
.
the fabric for my letter is black linen fabric.
.
the fabric of the pillow is duck cloth and can be purchased at hancocks, joanns, any place you can find fabric basically.
.
Attach the letter with straight pins.
.
Set your machine on one of 2 settings.

{this is where you will need to do some playing around with your machine. some machine's have an applique setting, once in this setting you want the stitch length to be really low, say .6 or .8 so the stitches are really tight; and the width to be really high, say 3.5 or 4, or if you do not have an applique setting you can use your machine's freehand buttonhole setting, again just check the length and width.}

**tip; this is my biggest piece of advice, when you go to attempt an applique USE GOOD THREAD. Don't buy this thread at a basic store like hancock's or joann's. Find your city's local sewing machine store or fine fabrics store and purchase high quality embroidery thread. This thread will be 100% cotton, a very heavy weight and will not be as fragile as a poly/cotton blend. This type of thread will run you $5.00ish a spool.

another reminder, if you are using 2 light weight fabrics buy some fabric stabilizer to help add weight to the back of the design.

Once you have determined which setting your machine will replicate the tightest stitches begin stitching away.

**another great tip, if your machine is not a "free motion" machine; meaning if it does not round curves on its own (often found to be a quilting or applique machine) you will need to stitch a little slower and stop quite often to slightly pivot and turn the fabric so you will have nice seamless stitches.

this is the first of my two pillows.
.
I am actually glad you can see the minor imperfections and learn from my mistake.
.
When working with linen and "appliquéing" linen please know the fabric will begin to unravel 
.
You will need some Dritz fray check, use a light amount of this along the edges of the letter BEFORE sewing {make sure to allow time for the solution to dry}

Then sew the letter on.
Tada, I must say I am pretty pleased with the outcome!!
.
linking up with..


Sunday, December 5, 2010

Homemade Christmas Decor

Hello lovely readers.

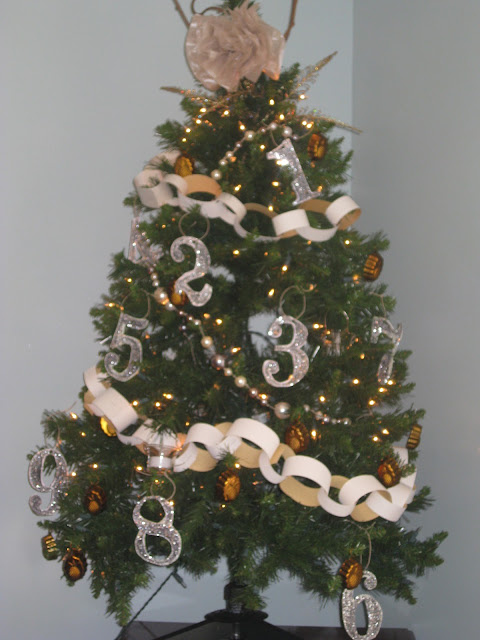
Today I am sharing my homemade tree.
(no the tree is not homemade, just all the decor)

There are several steps to each "ornament" grouping so I may be breaking this up into two posts.
We shall see.
A couple of years ago I found this AHmazing inspiration photo in Southern Living magazine.

To much avail I have been completely unsuccessful in finding the original photo.

I really wish i had it to share with yall.

First thing is first.

I knew I wanted art deco style numbers completely covered in glitter.

Luckily I found a great font and just printed the numbers in size 300 font out of Word.

I wanted to make sure my numbers were nice and sturdy so i glued the print off numbers 
(already on medium weight cardstock) 
To another layer of the cardstock. 


Then I gather my glitter, brush and trusty ole elmer's and got to work.


Apply glue to numbers and brush the glue on for even glitter application.


Apply glitter before glue dries.
Ps. it will dry a little faster due to spreading the glue out with the brush. DUH i know


Basically rinse, lather, repeat until your page is done.


Sidenote: I did this work in an old cookie sheet to contain the glitterness going on. 
Trust me there was LOTS.


After cutting out and drying i used my single hole punch and tied a circle of twine on to hang on the tree.


Okay ornament grouping # 1 donezo...


Enter elegance from pearescence.

I went plundering through my "stash" of things mom was getting rid of in her garage sale and Voila.

PBOutlet sale Beads.


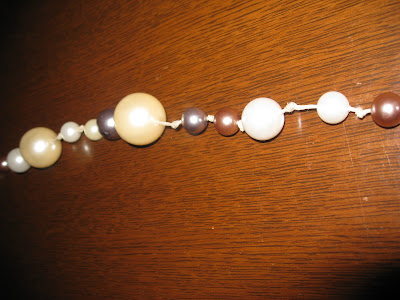
I checked the sizing with my already on hand twine and... SCORE, the twine slipped onto the beads.

Pretty straight forward on this, just either establish a pattern{my pattern was at random}

Rinse,
Lather,
Repeat again...


Tie knots between beads so they don't slip around. 


Because i did not have a super full box i made a tiny strand for the top and a larger/longer strand for the largest portion of the tree. 
{As seen below}


Now... do you notice the little copper dittys scattered about??

Can you guess what they are?

Think gifts....

Well, they are the miniature molds attached to every William Sonoma Wedding Registry Gift.

When we got married i had NO clue what i would do with them.

Mom suggested I save them and do a fun tree with them.

This seemed like the perfect year.

And it is so special to have these little items as reminders of all our wonderful family and friends who so graciously blessed us before we were married!

I LOVE looking at them.

And did you know the PINEAPPLE is the symbol of hospitality??

Well we are in the south and being hospitable is just a way of life around here.


Here is an upclose of one so you can see what they really look like.

For the tree topper I used several items.

Glitter feathers and twigs are from Hobby Lobby last christmas.

And the pouf was super easy. I found some wedding iridescent tissue paper at Hallmark and cut an 8x8 square.

Accordianed the tissue,

Tied a pipe cleaner in the middle,

And gently spread the layers to the front.

Super Easy.


Now what is a homemade tree without chain??

I found a TON of scrap cardstock laying around from various projects so i just cut some in 1/2inch widths and other as wide as 2 inches and attached with the stapler.

Again rinse, lather, repeat here....


Now as you can see things are slowly but surely coming together here.

And best of all....

Its adoreable, FREE decor!!!

I have been debating over gathering some burlap as a tree skirt or actually spending the time and making one.

I saw my sweet friend kellie's wreath in her babies' room and kinda had an idea....

What if i make a poinsetta cluster tree skirt?


Then i found this in Garnet Hill's catalog...

It's felt.

And it costs $198.00

I think i will attempt to make it. 


If i do tackle this would yall like a tutorial on how to complete?

I will be back in another post to finish up the tree and share lots more.

Stay tuned. 


Wednesday, June 23, 2010

Render, A paper-doll decor tutorial

As many of you may already know I was a fashion design major at The University of Alabama. (yes it is a real program and actually a few notable people graduated from it, i.e. Anthony Williams from this last season of Project Runway.)
Okay, get to the point jenny beth....sorry i do love to ramble.

One of the classes I hated,loved for reasons because it stretched me in ways i had never been stretched before was Fashion Illustration.
photo credit, ua hes website. (this is the Photoshop class)
Our instructor, Brian Taylor was not too much older than the students and we had a blast. We were always talking about the lastest fashions, what celebs were wearing, ya know the usual. 

Whenever we would veer too far from the path of learning, Brian would gain control of the classroom by yelling "Render!!!!"
{to render, artistically, means to create, shade, and texture an image.}
and back to work we would go, I began to actually love the pieces I created and I learned so much in one short semester, (to see some of my work here is a link to my very amateur portfolio.)

So..... when I discovered Erika of Urban Grace Interiors I fell in love with the beautiful plates over her baby's crib.

Absolutely stunning!! 

I began to think very lofty thoughts of rendering some of my most favorite outfits to hang over AC's big girl bed. Then.... I realized what I was committing myself to and went to mom for advice. 

Well being the hoarder, keeper of some very lovely treasures, She left the room for a while and emerged with 3 huge folders of all her paper dolls from the late 50's and early 60's!!!! SCORE!

The next day I went to buy my mod-podge and clear plates. $17.00 later I was set to create my one of a kind plates. 

If you remember my recent post on AC's big girl room you will remember my question as what to do with the main wall.


To Create mine I...
selected 9 of my moms paper dolls and photo copied them.
Purchased 9 clear dessert plates from Garden Ridge.
1 yard of burlap from Hancock's Fabrics
1 large bottle of mod podge
9 plate holders.

Step 1: 
Flip plate face down and trace the plate shape onto the burlap.
Cut 9 circles the size of the whole plate.
Step 2: 
Cut out the photo copies of the paper dolls (make sure its on card stock!)
Step 3: 
use a sponge brush to paint the UNDER side of the plate with mod podge
Then lay your paper-doll image in the middle of the plate

Step 4:
place the precut burlap circle on the back of the plate and ON TOP of the burlap paint on another layer of mod podge.
*allow the plate to dry face down for a few hours.

Flip over, trim excess burlap, attach plate hanger and enjoy!!
 
I think the plates really complete the room with a personal touch. I am so thankful I ran across Erika's blog and got inspired to create a set of the lovely items myself. 

Erika's plates are from an adoreable etsy shop called TreeHousePress.
These unique one of a kind pieces go for $72.00 a piece. 

I am very pleased with my $17.00 {for all 9} collection.